Once you’ve finished a project, whether it’s one track, an EP or a full album, you should always make sure you will be able to access the files in the future. Not just within the next few months, but years down the road. Let’s have a look at all the things to consider when creating backups of your work, so you don’t make the same mistakes as lots of others (including me).
Collect All and Save
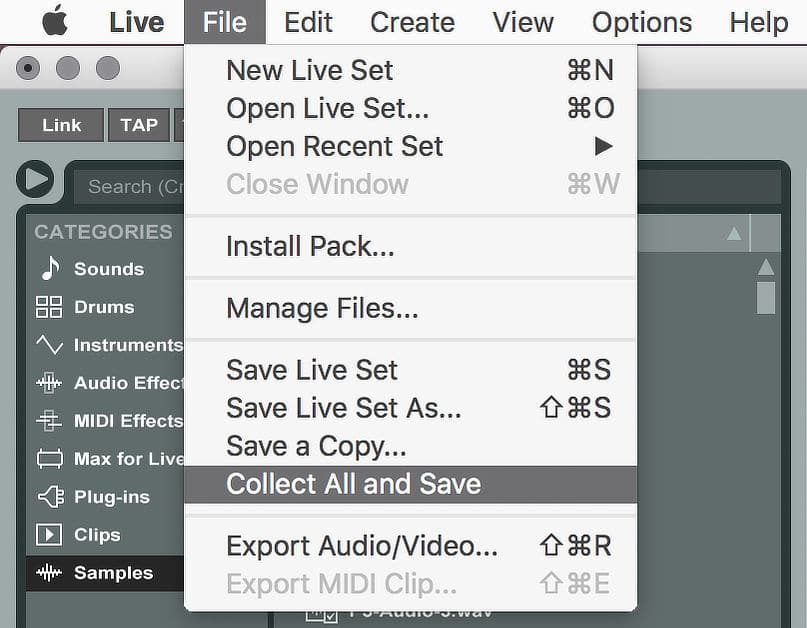
In Ableton Live, audio files you import, aren’t automatically added to the Samples folder of the Live Project, as is the case with all recorded and internally processed audio. So if you add some from an external HD or a USB stick, and it’s disconnected the next time you open the Live Set, the samples will be shown as missing. Use the Collect All and Save function under Live’s File menu whenever you’ve imported some files. I also wrote a more detailed tutorial about this and what to do when you already have samples shown as missing.
Freeze and Flatten
Then there’s the issue that VST and AU plug-ins might be discontinued or new versions might not load the old setting correctly or not at all. Or Max for Live devices you’ve been using in your production might no longer be maintained, especially if they were free. If any of these things happen, you will have trouble with your Live Set if you need to create an instrumental version or an edit for something.
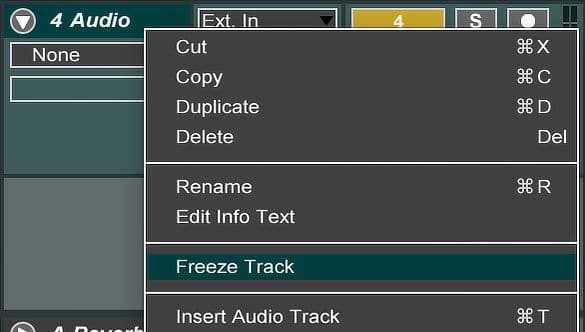
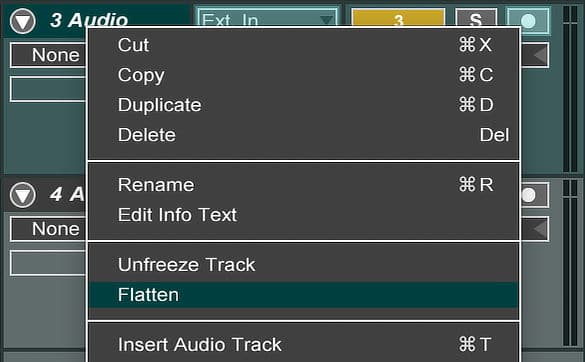
To avoid this, you could make a duplicate of the tracks that contain plug-ins or Max for Live devices, then right-click on the track title and choose Freeze Track. Live will create a sample file for each Session clip in the track, plus one for the Arrangement. Then right, click the track title again and choose Flatten. This will replace the original clips and devices with their audible result, which is why I’d suggest to make a duplicate of the track first. The original will be replaced by an audio track without any devices on with all clips in Session View and one in the Arrangement View, even if it was a MIDI track before.
Create Bounces
When a new version of Live is released, it comes with its own sound library that often differs from the previous one. While it’s possible to continue using an older Live Library, programming changes in the devices can change the sound sometimes. In total, with all the things that can get out of date, the best thing to avoid all of these pitfalls is to create bounces, in Live called export, which will create audio tracks.
Now the question is how you want to render the tracks. There are several options and all have pros and cons. The ones that give you more control will take more time to create, so you’ll have to decide which one is the best for you.
First you need to select the time frame you want to export. It’s common practise to use the Loop braces to select the start and end point in the arrangement. Now choose Export Audio/Video from the File menu or use the shortcut Cmd + Shift + R (Mac) or Ctrl + Shift + R (Win). The Export dialogue window opens. Choose the sample rate and bit depth that you’ve been working with in your project.
All Individual Tracks
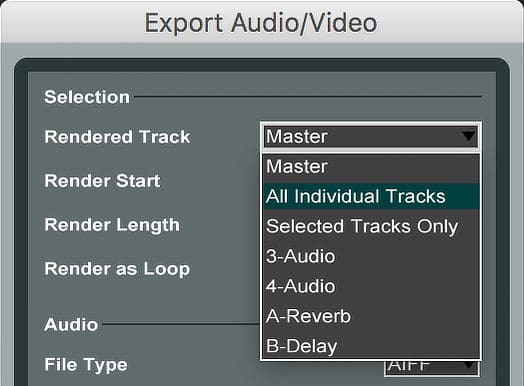
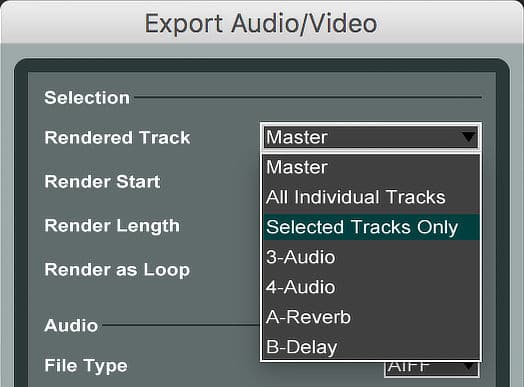
In the first drop down menu right next to Rendered Track, you can choose All Individual Tracks. This will create audio tracks for each individual track in Ableton Live including Group, Return Tracks and the Master.
Pro: Fast automated process.
Con: One exported file per Return Track, no matter how many tracks’ audio was fed through its effects.
Individual Tracks with Added Output from the Return Tracks
Another option is to export all tracks separately including the output of the returns the audio is sent to. The easiest way to do this, is to first select all individual tracks that don’t feed into any returns, use the shortcut Cmd + Shift + R (Mac) or Ctrl + Shift + R (Win), choose Selected Tracks Only from the dropdown menu next to Rendered Track and export these. Then you need to solo the first track you want to export with the output from the returns. In the first dropdown menu in the Export dialogue window now choose Master and export. Rinse and repeat with all tracks that make use of the sends.
Pro: All exported tracks have the effects included.
Con: Tracks need to be exported manually.
Individual Tracks & Separated Outputs from the Return Tracks
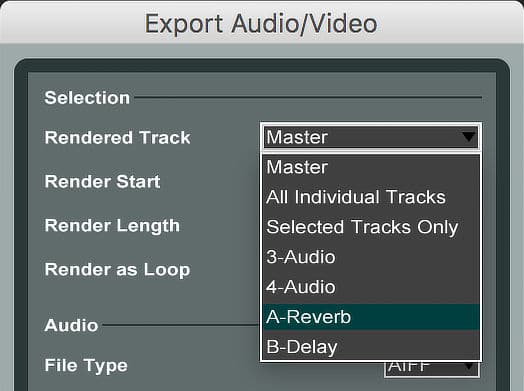
If you need even more control of the effects, you can do an export of All Individual Tracks and get rid of the created tracks for each Return Track, because we will render them again. Then select the first track that sends audio to a Return Track and solo it, use the shortcut Cmd + Shift + R (Mac) or Ctrl + Shift + R (Win) and in the dropdown menu next to Rendered Track select the first Return Track that the soloed track feeds into and export. Repeat with all other Return Tracks it feeds into. Then move on to the next track and repeat.
Pro: Return Tracks are exported per individual track that feeds into them for maximum control.
Con: Takes the longest as tracks and Return Tracks need to be exported manually.
Keep a Backup
Okay, so now that you’ve prepared the files of your productions so that you will have access and enough control over them in the future if necessary, there’s one last step. Create a backup (better make it two, since hard drives can fail) of the Live Projects and the bounces on an external hard drive and/or somewhere in the cloud.
That’s it. Now your work is all backed up and ready to be accessed whenever you need it.
Let me know if you have any further questions or suggestions of your own.










One Response
Re. your “Keep a Backup” – I use Git to track all my changes to my projects and submit my changes in the projects to BitBucket and/or GitHub. If you commit/submit often enough, you end up with a great history of edits that have been made, and the project can be ‘restored’ to specific points in your commit history.
There are umpteen GUI products available (many are free) to help make your use of Git a painless breeze.