Saving your work in Ableton Live seems easy enough to not need a tutorial, but it’s something that comes up fairly often as a problem when I’m giving lessons. This is, because the file structure Live uses is more complex than software like Word that uses only one file for all information. I made the same mistakes early on as well, and it can mean lost data and incomplete Live Sets.
The File Structure of an Ableton Live Project
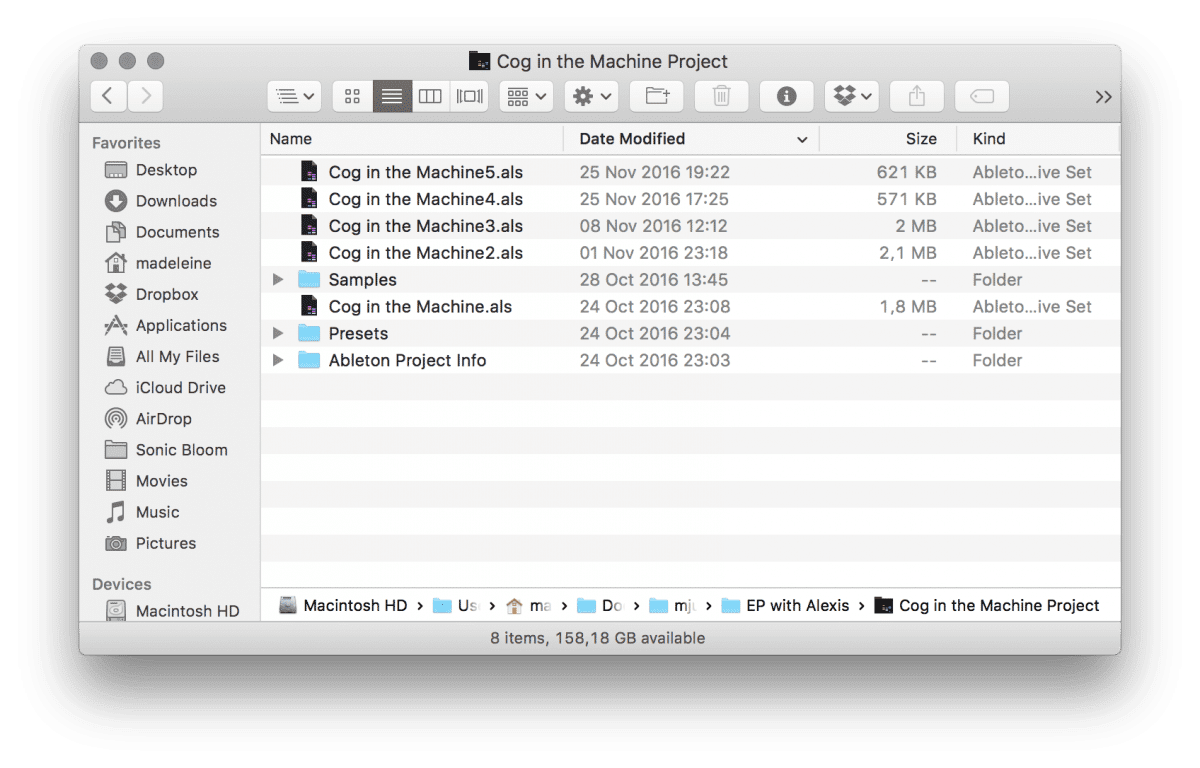
A Live Set in Ableton Live always needs to be enclosed in a Project folder which gets the same name as the initially saved Live Set. The reason is that Live only references audio files in the Live Set, but they’re not actually saved in the .als file, as this would make it huge rather quickly. So instead, the Project folder also contains an “Ableton Project Info” folder and a Samples folder that the recorded or processed audio which generated a new audio file is saved into. There can also be other folders included, like the Presets folder in the screenshot, which contains Max for Live devices used for this song.
Saving in Ableton Live
The idea is that within this Project folder you’d also save versions to keep different states of your music production process for a particular song, track or live performance set. You can simply number the versions as you progress, add the date or a short note of what you’ve been working on.
Now, let’s talk about the different options for saving a Live Set in Live.
Save Live Set
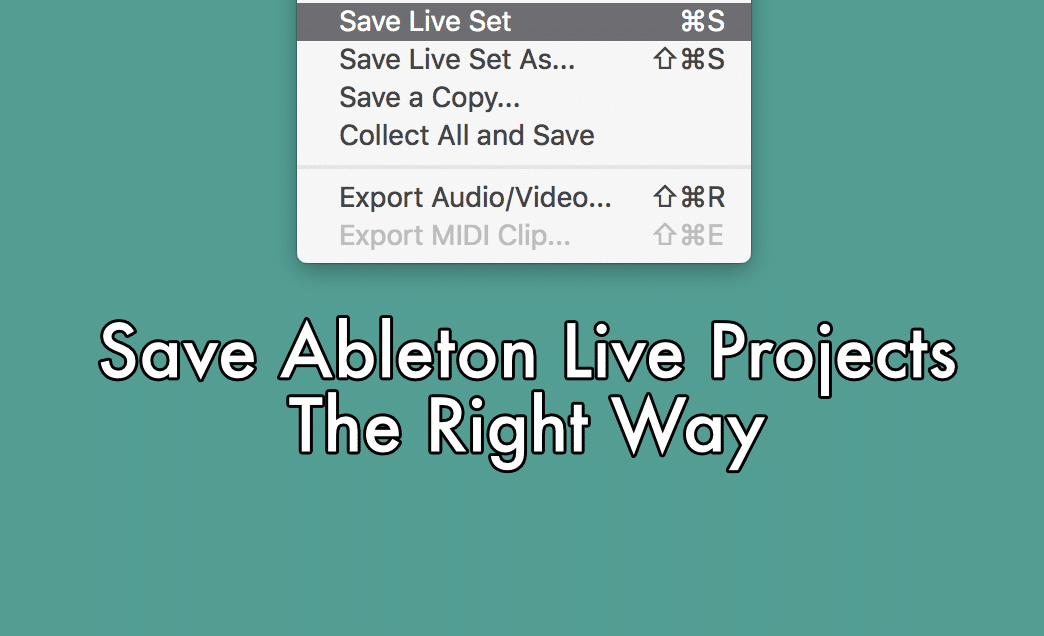
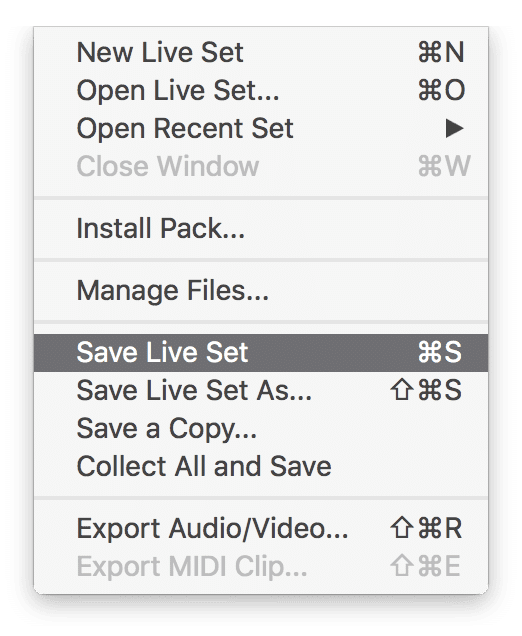
When you save a new idea, this is the command you’d use or the shortcut Cmd+S (Mac)/ Ctrl+S (Windows), just like with any software that allows saving. “Save Live Set” also saves the state of the currently open Live Set by overwriting the same file, which in turn empties the Undo History. Keep this in mind, when saving. You don’t want to be unable to undo something you end up not liking, but you also want to keep your work safe. I generally save once I’ve made a change, listened back and am happy with it.
Note: Make sure, you don’t save a new Live Set within the Project folder of another song or track, or else you will encounter the pesky “Media files are missing” message later on, because the Project folder for it can’t be created in another one. Thus, the Samples folder will be missing, and you’ll easily lose files. The Live Library is also off limits, as it might be broken this way. It’s best, when you create a dedicated folder in Finder/Windows Explorer, that you then save each new Live Set into.
Save Live Set As… vs. Save a Copy…
“Save Live Set As…” is for saving a new version of the Live Set you’re currently working on, e.g. MyTrack02.als. In this example, MyTrack.als gets left behind in its last saved state, and you go on working with MyTrack02.als. You can also completely change the name of the set and/or save it in a new location. Generally, you’d simply change part of the name and save it within the Live Project folder just like the initial version.
With “Save a Copy…” on the other hand, the working scenario is different. You keep working on your initial Live Set, e.g. MyTrack.als, throughout the whole production process. You use “Save a Copy…” to take a snapshot of the current state. Again, you can change the name of the set and/or the location. If you choose the default name, your track will be saved as “MyTrack Copy.als”
As long as you use either command to save a file within the Project folder, just a new .als file will be created. If you choose to save it somewhere else, a new Live Project folder by the same name will be added in the selected location, that will contain the “Ableton Project Info” folder as well as the .als file itself, but not the Samples folder. To avoid missing media files, use the “Collect all and save” command from the File menu, say, if you want to move it elsewhere for backup or to send it to a collaborator.
Which way of saving you prefer is up to you. I personally use the “Save Live Set As…” command, because it’s the only one that offers a keyboard shortcut (Shift+Cmd+S (Mac)/Shift+Ctrl+S (Win)).
Note: Creating different files while progressing through the music production of the track is useful if you have managed to make matters worse and the older version sounds better. And if a Live Set becomes corrupted, which can happen during a crash, you can always go back to the previous version. I often end up with 30 or more versions until I’ve finished the production.
You’re of course always welcome to add questions or suggestions in the comments below.
There are plenty more Ableton Live tutorials where this one came from.











10 responses
btw little help for making ‘collect all and save’ more accessible with this tip from Freddy Frog (French ableton trainer)
Creating Your Own Shortcuts for Any Apps on Mac
It was in French, so let me translate it for you, I guess you can use it within any DAW or DJ app.
Im gonna give a short example, if you wanna Collect All and Save in ableton, there is no shortcut for it, but you can create it on your Mac.
Go to Sytem Preferences -> Keyboards -> shortcuts
Then select ‘app shortcuts’ on the left windows, press the + button, click on all application and find ableton live
Now type word for word, and letter for letter the command you want, in my case: Collect All and Save
And attribute the shortcut you want, I put Cmd+shift+S for me
But important, make sure to refer to your DAW/app manual to check what are the existing shortcut on it, to make sure to not duplicate one, to get no conflict.
Nice tip. Cmd+Shift+S is “Save Live Set as…” though.
this article had exactly the information i was looking for, thanks so much!
Hello,
I was curious how many hard drive’s you are running and if more than one which hard drive are you saving your projects to? Ableton has an article about running multiple drives for best performance but they don’t specifically state which of those drives the projects should be saved to.
I’m running on internal one and one external one. Saving to the internal one, particularly if it’s an SSD drive is usually best.
Hi There,
Thank you for taking time to post this great article on this topic, as I was looking everywhere to find out what is best practice. So I ended up creating two new folders under the Music folder in Finder, outside of the Ableton folder completely, just to be safe, one called “MyAbletonLiveMusic” and the other “MyReasonMusic”, since I just installed Reason 10…looks amazing by the way.
Anyway, this seems logical and I can always find every project or song I am working on, or have finished. Good stuff, thank you again!
Hi sonic bloom ,having read your advice on saving an Abelton project and then copying to an external drive , I’m correct in thinking that if in the near future, I’m going to have to change to windows 10 and save all my material externally this
means live guitars /analogue parts etc ,will all the parts remain un corrupted when I have to reopen files on new OS. It seems to me you are suggesting collect and save is the safest option.? Although I had considered installing win 10 and keeping windows 7 on partition. Thanks for your advice.
What can change with an upgrade with the OS is mostly that plugins used in Live Sets might no longer work. That’s why backing up your projects properly is so important. Also make sure you create a backup of the Ableton User Library and the Factory Packs. The location of both can be looked up in the Live Prefs > Library. And of course, Collect All & Save for files from elsewhere and other projects saves you the headache of finding missing audio files.
Thanks for this. Is there a way to rename the root project folder so that it’s saved with the new name? As opposed to just renaming the project folder in the finder so that the file is called something different than the project when you actually open it up? Or are you unable to change the saved name of the original/root project folder? Thanks.
You can rename the project folder in the Live Browser.