Since there are two views in Ableton Live, you can export audio from both the Session and Arrangement View, or even a combination of both. This is why it can be confusing at first and you might end up with unexpected results or even silence. The most important bit to remember is what you hear is what you get.
Exporting from Arrangement View:
- Most often you want to export the whole song you’ve created or its individual tracks. To do this, you need to have it recorded into Arrangement View first. If you don’t know how, here’s the tutorial for it.
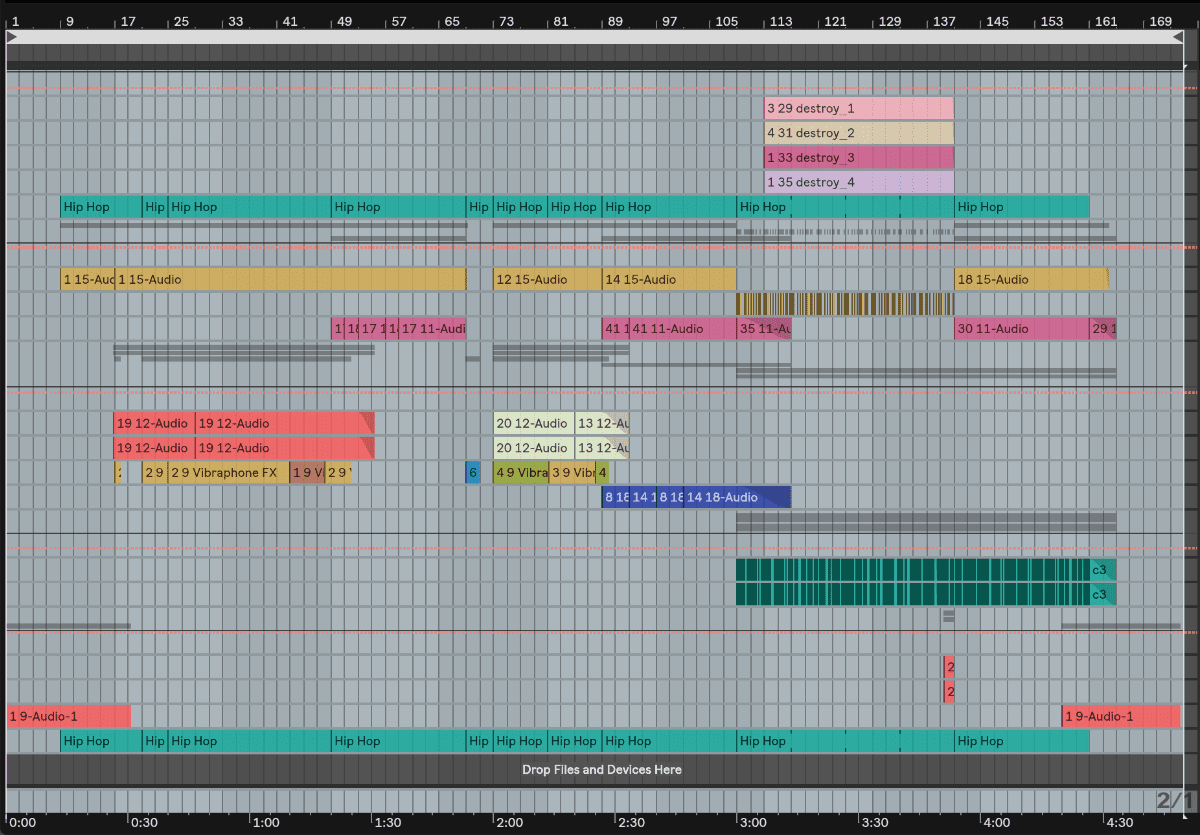
- Drag the Loop Start and Loop End so the Loop covers the whole length of the song (or part you want to export) including all effect tails (reverb, delay) to be exported. Make sure the Loop is selected.
- Check that no tracks are muted that you want to include and no tracks are soloed, because what you hear is what will be exported. Also make sure that no clips in Session View are launched as they’d be rendered into it as well. You can listen to the song once more to ensure it’s all good.
- Choose ‘Export Audio/Video’ from the File Menu or use the shortcut SHIFT + Ctrl + R (Windows) or SHIFT + Cmd + R (Mac). This will open the Export dialogue.
- Choose your preferred rendering options (details below), then click OK.
- You can now choose the location to which the audio file(s) will be saved. Click Save and the rendering process will start.
Exporting from Session View:

- When exporting Session View clips, only clips with activated clip launch buttons are rendered. Tracks that are still active in Arrangement View (not greyed out) will also be rendered in. So make sure that all clips you want to export are launched first as well as mute unwanted tracks or press the clip stop button for these tracks.
- Choose ‘Export Audio/Video’ from the File Menu or use the shortcut SHIFT + Ctrl + R (Windows) or SHIFT + Cmd + R (Mac). This will open the Export dialog.
- When exporting from Session View you need to enter the desired Length in bars, beats and 16th as well as render start (the default is 1.1.1).
- Choose your preferred rendering options (details below), then click OK.
- You can now choose the location to which the audio file(s) will be saved. Click Save and the rendering process will start.
Audio Rendering Options:

‘Rendered Track’ options:
- If you want to export the mixdown of the song, choose ‘Master’.
- ‘All Individual Tracks’ will render each single track to separate audio files. That includes all MIDI and audio tracks as well as return tracks.
- ‘Selected Tracks’ only renders all tracks that were selected before opening the export dialogue.
- Or you can choose a specific individual track or return track. You can easily find the one you want since the track numbers and names are listed.
- All options will render the post-fader signals including insert effects.
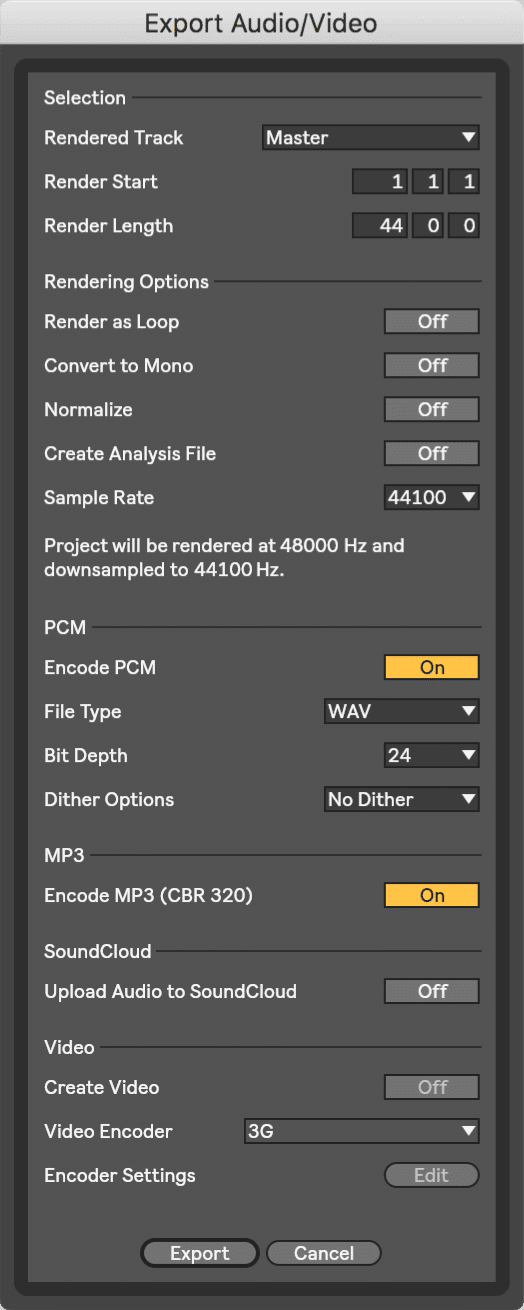
- ‘Render as Loop’ lets you render the file as a loop including any effect tails.
- ‘Convert to Mono’ will render the file in mono. Live handles everything in stereo. This option is useful if you want mono files to be used in a different audio software or want to include mono files in your Live Set to keep it small.
- Turn on Normalize if you want the file to be rendered with maximum volume (keep it turned off if the track is to be mastered).
- You have the choice between Wav (Windows format) and Aiff (Mac format) under ‘File Type’.
- ‘Create Analysis File’: Turn it on if you want to import the rendered file back into a Live Set.
- ‘Sample Rate’: To burn it to an audio CD, choose 44100. For mastering choose the ‘sample rate you had used throughout your production or the mastering studio asked for.
PCM (pulse code modulation) options:
- If you want to export an uncompressed file, make sure ‘Encode PCM’ is turned on.
- You’ve got the choice between Wav, Aiff and Flac under ‘File Type’. The first two are most commonly used if the audio is to be worked on further. Flac isn’t technically a uncompressed format, but the compression is lossless, so better than MP3.
- ‘Bit Depth’: To burn it to an audio CD, choose 16. For mastering choose the bit depth you had used in your Live Set or the mastering studio asked for.
- Dither: Dithering introduces small noise, but helps avoid artefacts when reducing the bit depth. Live handles audio internally in 32-bit. Dithering should only be done at the end when you won’t export the file again. This is generally after mastering the track or when you want to burn it on CD. If you choose to not export in 32-bit and want to keep working with the audio file, Triangular is the safest mode. Rectangular adds less noise, but can add artefacts once the audio file is processed further. The 3 POW-r options introduce even less noise pushed above the audible range. These should never be used when processing audio further.
- If you want Live to export an MP3, turn on ‘Encode MP3 (CBR 320)‘. This will create an MP3 at 320 kbps.
- If you’d like to upload the bounced file to Soundcloud, then turn on ‘Upload Audio to Soundcloud’.
Do you have any questions or comments? Let me know.
There are plenty more Ableton Live tutorials where this one came from.


28 responses
Hi Madeline,
Thank you for this article; regarding the Encode mp3 option: does this mean that I no longer need to use an external file converter to convert my exports from live in to mp3? Thank you
Yes, if you’re fine with 320 kbps MP3 files (the compression level cannot be set), you no longer need any other software for decoding.
What about the dither options? If we are exporting the mp3 direct from Ableton, do we no longer need to dither the WAVs? Or would having dither disabled impact the mp3 creation?
Uncompressed export (wav, aiff, flac) and MP3 are not connected in Live 10. Doesn’t make sense anyways, since MP3 is compressed and has its own way of minimising artefacts.
Frequently, clips I’ve exported and then imported back into Live have lengths don’t match the original clip by a very slight amount. Do you know why Ableton Live would alter the lengths of clips upon exporting them? I notice it’s happening by the clip’s “Sample” window, which shows an orange/red number for the “End” duration’s last digit.
I just posted this question on your previous article, but I’ll add some of the specs I’m using on export:
Mac
Live 9, Live 10
File Type “WAV”
Bit Depth “32”
Normalize “Off” or “On”
Render as Loop “Off”
Dither Options “No Dither”
Convert to Mono “Off”
Create Analysis File “Off”… this setting might be the problem if Live has to create the analysis file on import?
I’m wondering if the issue is rather that the clips might be warped, but not in the exact tempo, so they appear shorter. I’d suggest to see if turning warp off might remedy things.
I’d like to say, really thank you so much I appreciate your time to explain that
Hi!
You know how to, if possible, to export surround mix in Ableton Live 10?
Fx first doing a 8-channel mix with the max surround-panner, and then export it as 8 separate tracks.
Thanks for help!
Morten.
Simply render “All Individual Tracks” or select the 8 tracks and choose “Selected Tracks Only”. Or if you want to make sure everything is exactly as you want it, you could also render each of the tracks separately, but this would take more time and involvement from you.
More precisely, wouldnt you have to either:
A) send the surround panner to 4 stereo tracks, then duplicate them and pan each pair L and R to achieve 8 mono channels? Since Surround Panner only sends to stereo pairs?
B) Use the surround panner as 16 channels (thus sending to 8 stereo tracks) and then do ‘selected tracks only’ and ‘export as mono’ to get 8 mono tracks?
Option B would take less time, since you wouldnt have to duplicate each track and pan them. Although i believe it would be less precise.
Unless there was a way to send Surround Panner as 8 mono outputs. But it doesnt seem to do this.
Thanks!
Ben
No, but I should have mentioned that it would be useful to check ‘export as mono’. What you seem to be missing is that Live itself operates in stereo only. So an 8 channel mix would achieve 8 stereo channels, where left and right are exactly the same.
How do I delete metadata from my stems? After I bounce and try to import to a loop pedal it says unsupported format, but its 16/44 as required. I think it’s the metadata, how do I delete it?
There isn’t a way afaik. I’m not even sure that the meta data would be the issue. You could try loading the stems in an audio editing software like Audacity or Wavelab etc. and resave them. I’d suggest first checking the manual for the loop pedal to see which formats it accepts to rule out the problem lying there.
Thanks for the reply! I bounced them in audacity to resave without the meta data. Based on some other forums for the loop pedal, I think that’s the work around. Not a huge deal, but another extra step to get my stems ready…
so if I export tracks as mono does live convert them & replace the stereo tracks within the session or only the exported files themselves that go to your selected folder destination? and does it do it as mono L & R or just one single mono track. I mix in PTs and normally convert stereo to mono within PTs & go from there. but this takes forever sometimes. thanks in advance
There isn’t a bounce in place feature in Live (I think that’s what you’re looking for) and Live processes in stereo internally. If you export tracks in mono, only the exported files would be in mono in the folder you’d selected. You’d have to reimport them into Live via drag and drop.
Hello
I’m doing a sample pack of an Album. Question? PCM encode ON? I’m using compression on some no all samples. Also do I keep Normalize off? I’m kind of Mastering the Sample in a way..
Thanks in Advance!
Definitely PCM encoding on, because the sample should be uncompressed (nothing to do with compressors – it’s about the file size and thus quality). If the sample pack is for Live, turn on Create Analysis File. I wouldn’t normalise. Most sample packs and presets are too loud as they’re supposed to be combined with other sounds to a full track.
HI, I’m trying to do my first ever recording on Ableton Live. I have recorded a separate track and then exported and save on my laptop. Then I have added that track to another project but when I add it, it glitches and I don’t know why. Can you help ?
It’s probably warped and in a way that isn’t right. Try turning of Warp in the clip and listen if it improves things.
Hi Madeleine! Good tutorial! I have a question. I’m rendering an audio track (vox recorded in the project) to a Wav file. I’ve treated the audio with Waves Tune Mono plug-in and want to export it so I don’t have the plug-in switched on which will save on processing power. However, when I drag and drop the exported Wav back to the project, unwarp it and compare it to the audio on the original channel from which I rendered it, I can hear that the Wav file is quieter (the wave form also looks smaller). Both tracks are set at 0 volume and have no effects on. Do you have any idea why that is and how to fix it, please?
MacBook Pro
Live 10.1
Rendered Track: Master (Master always set at 0 volume)
Include Return and Master Effects “Off”
Bit Depth “24”
Normalize “Off”
Render as Loop “Off”
Dither Options “No Dither”
Convert to Mono “On”
Create Analysis File “On”
Sample Rate “44100”, just as the project
Thank you in advance!
Hey SPLICE.COM have standard to render all samples in -1db. How could I do that? So i need to swith on normalize for max. volume. But how can i take – 1 db on it. I need to make this rendering for 300 wavs. Or i could bring all samples in each channel put limiter with -1db. And marked all tracks and render just like selected tracks rendering. Or maybe marked all and render all tracks separately. Any idea? Thanks..
Add a limiter to the master or the tracks you want to render and set it to -1 dB. Tbh, I’m not sure why you’d want to have individual tracks all rendered to -1 dB.
Question for you…. After exporting my track, both MP3 and WAV, neither of them will make any sound…. They track but I cannot here anything and it works fine in Ableton. Something I should be looking for?
You have to select the time frame if exporting from the Arrangement View, or make sure to have the clip launch buttons of the clips you want to export on when exporting from the Session View. If you haven’t done this, you’ll get silence.
I’m having the same issue with exporting to MP3 and WAV. Neither have any sound. I’ve watched the videos and I seem to be doing everything everyone else is doing. If I render one track it does it just fine. When I render multiple tracks into the master track I get silence.
Please read my replies to the other comments. It’s a user error, which I’ve explained in the tutorial and more in the comments.
I figured it out. It was an issue with using an interface and routing the tracks to “ext out” versus “master” in session view. (I normally use arrangement view.) It didn’t have anything to do with the normal process which is what most videos talked me through. I just have to remember to switch the routing back to “ext out” so it will work with my interface.