This is part 3 of the Housekeeping series. Before you start archiving you might want to tidy up first as described in parts 1 (Collecting Files) and 2 (Finding and Deleting unused Files).
Archiving as Live Packs
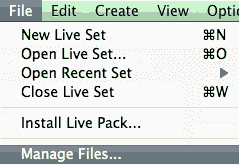
- Open the File Manager by choosing ‘Manage Files’ from the File menu.
- Click on ‘Manage Project’.
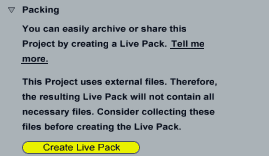
- Click on the little triangle next to ‘Packing’ to unfold its options.
Click the ‘Create Live Pack’ button which will open a dialog.
- There you can specify the name and location of the Live Pack to be created, then click Save.
The resulting Live Pack has the ending alp. Creating a Live Pack works just like creating a zip-file. The contained files will be compressed, thus saving up to 50% compared to the original Live Project. Meanwhile, the Project itself remains unchanged.
To unpack a Live Pack, simply double-click it, drag it into the main window of Live or locate it via the command ‘Install Live Pack’ from the File menu. Live will ask you to choose a location where you want the Live Project to reside. If the Live Pack contains Factory content, it will be automatically installed into the Library without asking you for a location.
This way to the first, second and last tutorial of the same series.
Anything to ask or add? Simply leave me a comment. 🙂










2 responses
I want to to thank you for this wonderful read!! I certainly loved every little bit
of it. I’ve got you book marked to check out new stuff you post…
great idea.
Perfect article for a back up idiot like me :/