When working on music, you quite often deal with big file sizes and lots of files can get accumulated rather quickly. Sure, computer hard drives offer increasingly more space, but as with anything, some tidying up becomes necessary and should be done routinely. Of course, you don’t want to do this while being creative and in the flow. And you don’t need to. There are some neat functions included in the File Manager for the housekeeping in Live.
Locating and Collecting Files
You might already know that with Live’s File Manager you can locate missing samples and collect them into your current Live Set. If not, I’ve already explained this in a tutorial. However, you can also do this for more than just a Live Set so you can choose which files to perform the housekeeping on and with a few clicks let Live do most of the work for you while you can wander off to do other things.
The Live Library

The current Live Project

Any Live Project
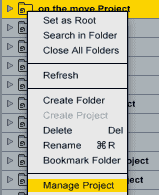
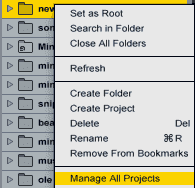
All Projects within a folder (and its subfolders)
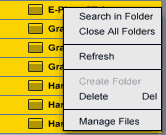
Any selection of Live Sets, Live Clips or Presets
Depending on how many files you’ve chosen to perform the housekeeping on, the process of Live scanning everything might take quite some time. Now you can locate Missing Files as described here, or collect External Files into whatever you’ve chosen.
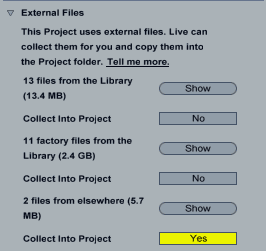
- Click the triangle next to External Files to unfold its options. If external files are used, their number in each category will be displayed – Library, other Projects or elsewhere.
- Click ‘Show’ to see the external files from each location in Live’s Browser.
- Activate the ‘Collect into Project’ from the desired locations.
Once you’re done, don’t forget to click on ‘Collect and Save’ at the bottom of the File Manager to save all changes.
Continue to housekeeping tutorial part 2.
Anything to ask or add? Let me know. 🙂











2 responses
Hi Madeline,
I am a new member.
Love your site’
You are a born teacher!(I say this as someone who taught at a university
for many years).
I am interested in the housekeeping tutorial to
rescue me from the chaos I have created with my live files.
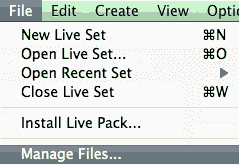
But In Live 9 I do not seem able to enter the manage projects or
manage files command from the browser.
Any suggestions
Thanks
Michael Fibonacci
Thanks for your praise. Unfortunately these functions are gone in the new Live 9 browser and as it seems without an adequate replacement elsewhere. You can only go through all of your Live Sets or Projects separately for some housekeeping.