This is part 2 of the File Management series. Before you attempt to follow this one, you should go through part 1 (Collecting Files) to avoid accidentally deleting any files you still need in other Live Sets.
Finding and Deleting Unused Samples
Warning:
Don’t delete any samples if you haven’t gone through part 1 of the File Management series. Be particularly cautious when doing this with the User Library.
In the current Project
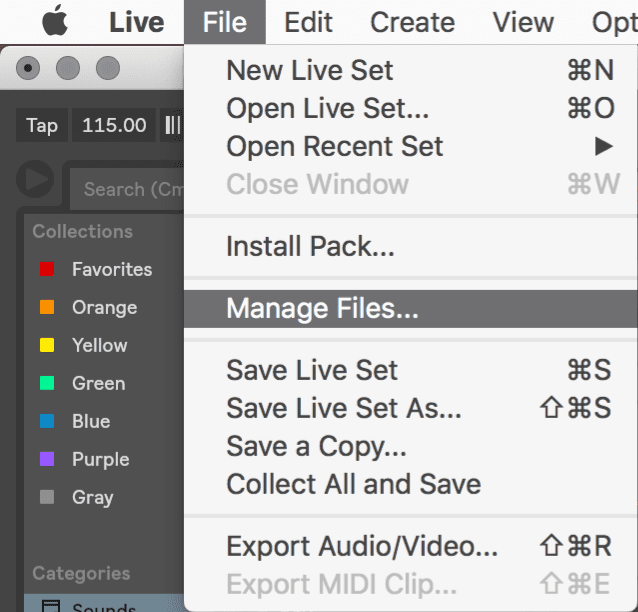
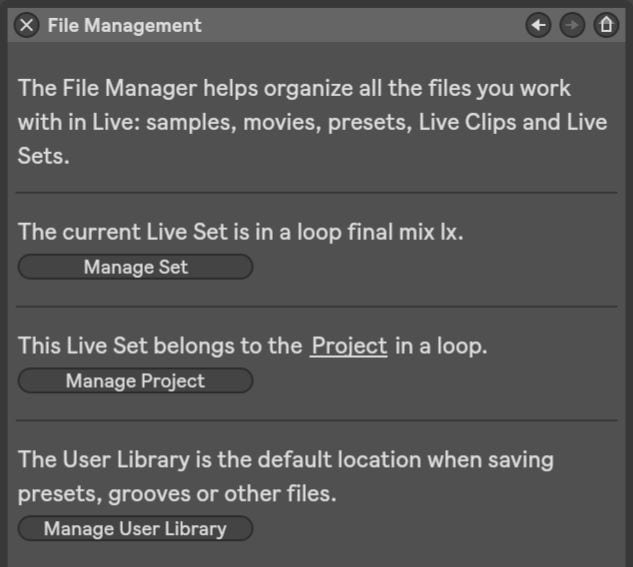
- Choose ‘Manage Files’ from the File menu. The File Manager will open in a panel on the right side of Live.
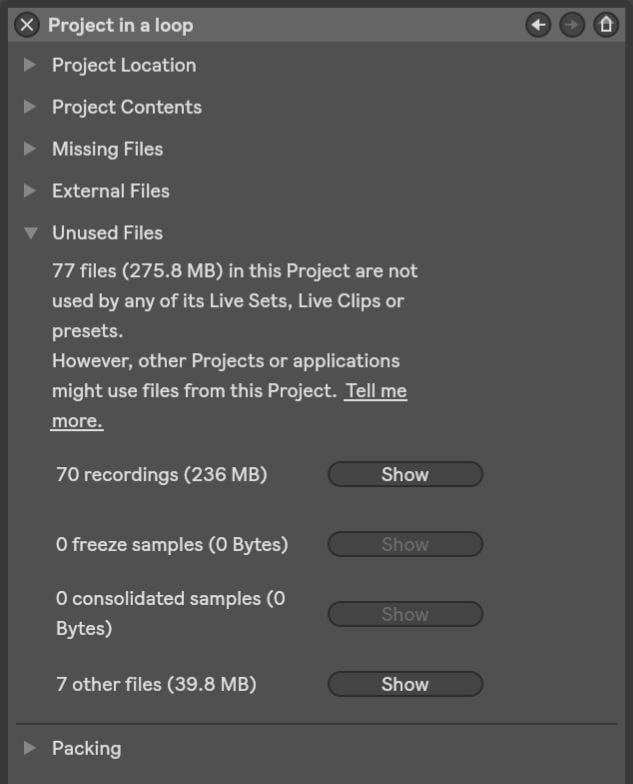
- Click on ‘Manage Project’. Live now scans all files in the current Live Project.
- Click on the little triangle next to ‘Unused Samples’ to unfold its options.
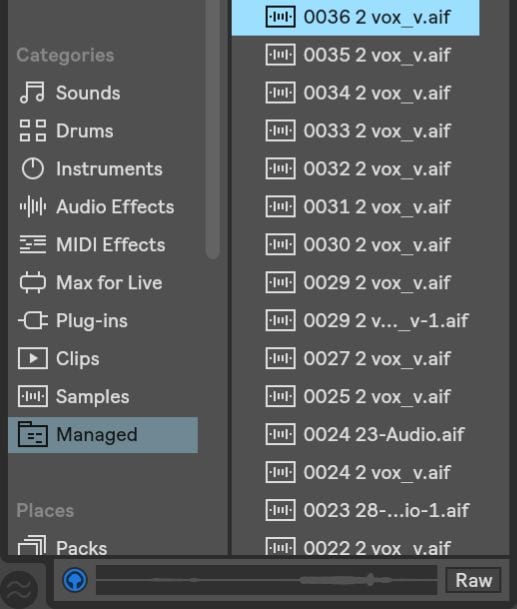
- Click on the Show button to get a list of all unused samples in Live’s File Browser in the appearing ‘Managed’ catogory.
- You can preview the samples there. Make sure the headphones icon at the bottom left of the File Browser is turned on. Highlight the clip, then click on ‘Click to Preview’.
- You can delete some or all.
In the User Library
- Choose ‘Manage Files’ from the File menu. The File Manager will open in a panel on the right side of Live.
- Click on ‘Manage User Library’. Live now scans all files in Live’s User Library.
- Follow steps 3 to 5 from above.
In any Live Project
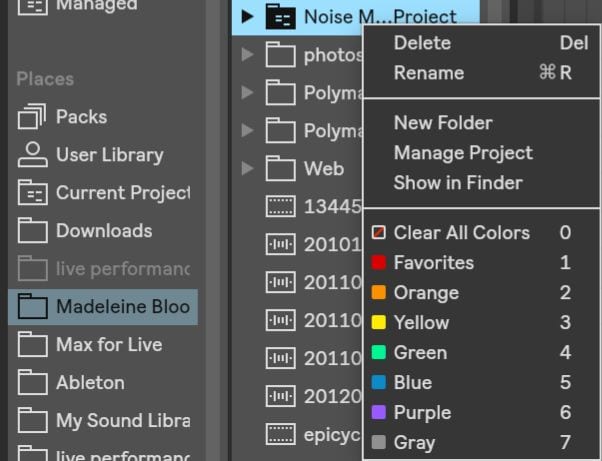
- Right-click (Win) or Ctrl-click (Mac) on a Project in the Live Browser and choose the ‘Manage Project’ command from the context menu.
- Follow steps 3 to 5 from above.
Haven’t checked out the first part of the file management tutorial series, yet? The third part is this way.
Do you have any questions or remarks? How about a comment?












One Response
Thanks for the help. Was looking everywhere for this (new to ableton)