Resonator is an audio effect I use quite a bit. Anyone who has downloaded any of my free racks will likely have noticed this. I feel it is still rather underrated and deserves more attention. I couldn’t actually find any tutorial on Resonators after the changes with the Ableton Live 12.2 update, so that’s why I made one, which includes a full walkthrough, as well as five examples how the effect can be utilised for sound design.
The way Resonators works is actually quite simple. It consists of five resonators, hence the name. The signal for each resonator is first passed through a filter, and then into the resonators in parallel. Resonator I is fed with the stereo signal coming from the filter, Resonators II and IV are fed with the left channel, and III and V with the right. It can be used for anything, from just another way to thicken the sound to drones, to melodic material from percussion or drums.
Watch the Video:
1 – Drums to Melodic Percussion
In the first example, we’re going to turn a basic drum clip into melodic percussion that can even have its own top melody. To emphasise the darker sound quality, we’re going to switch to Mode B, turn Decay all the way up, and keep Color at 90%. Let’s set resonators I to IV to just octaves up and down, with Use Current Scale turned on, and Dry/Wet set to 100%.
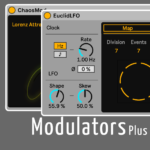
Before we turn up the Gain to 15 dB to create distortion, we’ll add Drum Buss (or a compressor of your choice) to avoid too extreme peaks. Then, we’ll set the Resonators’ filter type to Notch and set it to around 190 Hz. Last but not least, we can use a modulator to map the last resonator’s pitch and modulate slowly in a defined range to play a melody. In this case, I use ChaosMod from Modulators Plus by Max for Cats.
2 – Vocal Tail
Example 2 works well on vocals, or any lead instrument really, especially in quieter passages where you’d like to add some interest. Essentially, we’re going to use Resonators to create something akin to a reverb or delay tail, without any reverb or delay. And we’ll make sure that the tail becomes more pronounced whenever the vocal (or lead) becomes more quiet again.
I’m going to turn on Use Current Scale, just in case, keep Mode A, set the Decay to about 80, turn Constant off to get longer tails the lower the notes, and crank up Color to 100. Then we’re going to set the first three resonators to three octaves down, Width to 100%, and the filter off. And to make the tail come in stronger when the vocal volume decreases, we’ll add Envelope Follower, mapped as remote to the Resonators’ Dry/Wet, set for min at about 20% and max at 0%.
3 – Reshape Bass
Let’s see how we can employ Resonators to reshape an existing bass sound. We’ll turn on Use Current Scale once again, keep it on Mode A for more tuned resonances, fully crank up Decay and Color, and turn Constant off for varying decay times. Next, we’ll set the resonators to -7, -14, -21, +4, -3, and make the sound 100% wet. We’ll set the filter type to Notch, and dial in the frequency around 630 Hz.
Now, we’re going to add Compressor and just adjust by ear. And, to achieve a kind of gated effect on the bass sound, we’ll add the LFO, set it to Square wave and 1/4 for the Rate, then map it to Global Gain in Resonators as automation (remote), with the range set to 0 and 50%.
4 – Make It Vintage
Sometimes, we might want to create the illusion that something is an old recording. For this, we can also use Resonators. We’re going to turn Use Current Scale on, keep Mode A, set Decay to 100, Const off, and maybe Color at around a third. The resonators we’re going to set to three octaves down, two up, Dry/Wet to about 75%. Let’s switch the filter type to Band Pass, then set the Frequency to 222 Hz.
To make the resonances more pronounced and add some warmth, we’ll add a Saturator preset. The “A Bit Warmer” is a great choice as is.
5 – Shimmering Drones
When most people think of drones in music, they have darker, moodier sounds in mind. But why not make it brighter, sparkly, shimmering sometimes, and Resonators can be a great tool to achieve this. Drones can be a good and simple way to give a chorus or other high energy section more oomph, or to make the sound seem thicker.
This time, we’re going to add Reverb first. The lazy option is to simply pick a preset like Cathedral, that has a long decay time. We’re also going to turn on Freeze to make it all more drone-y.
Now, we’re going to add Resonators, turn Use Current Scale on, keep Mode A, set the Decay to something around 20, as we’re creating most of the tail with the reverb, but we want to keep the resonances. Set Const to off, and Color to about 45. The resonators we’ll set to +2, +4, -7, +9, +11 (or anything you’d like to try, really), Width and Dry/Wet each to 100%. Let’s switch the filter type to Band Pass, then dial in the Frequency to around 2.5 kHz.
If we add the default Limiter preset at the end of the chain, we can experiment further. Maybe double the Cathedral preset, and move the second one before the Limiter? How about a delay?
Do you often use Resonators? If yes, then what’s your favourite or typical use case? Or, do you have any questions? Please leave your comments down below.